
You can see a demo in this blog.
ADDING SOCIAL MEDIA ICONS TO BLOGGER HEADER
Step 1. Go to blogger.com then Log in using your user name and password.
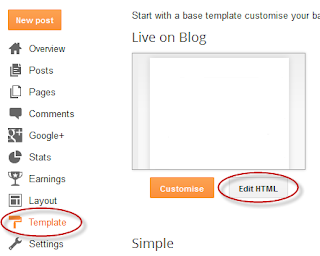
Step 2. From your Blogger dashboard, go to Template and click on the Edit HTML button:
Step 3. To expand the style, click on the small arrow on the left of <b:skin>...</b:skin>

Step 4. Then click anywhere inside the code area to search (using CTRL + F) for the ]]></b:skin> tag.
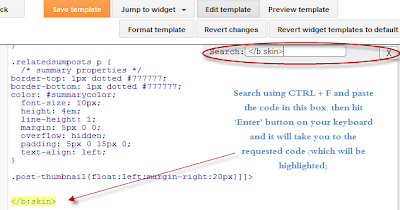
Step 5. Add this code just above it:
  /* Social media icon for Blogger - ajebus.blogspot.com
 ----------------------------------------------- */
 #social-icons {
 margin-bottom:-30px;
 height:50px;
 width:100%;
 display:block;
 clear:both;
 z-index: 2;
 position: relative;
 }
 .social-media-icons {
 display:table
 }
 .social-media-icons ul {
 text-align:right;
 padding:5px 5px 0 0
 list-style-image:none;
 list-style-position:outside;
 list-style-type:none;
 }
 .social-media-icons ul {
 margin-bottom:0;
 padding:0;
 float:right;
 }
 .social-media-icons li.media_icon {
 margin-left:6px;
 padding-left:0 !important;
 background:none !important;
 display:inline;
 float:left;
 }
 .social-media-icons li:hover {
 -moz-transform: rotate(360deg);
 -webkit-transform: rotate(360deg);
 -o-transform: rotate(360deg);
 transform: rotate(-360deg);
 -moz-transition: all 0.5s ease-in-out;
 -webkit-transition: all 0.5s ease-in-out;
 -o-transition: all 0.5s ease-in-out;
 -ms-transition: all 0.5s ease-in-out;
 transition: all 0.5s ease-in-out;
 }
Step 6. Now search for this line
<b:section class='header' id='header' maxwidgets='1' showaddelement='no'> Step 7. And just above it, add this code:
 <div class='social-media-icons' id='social-icons'>
 <ul>
 <li class='media_icon'><a href='http://facebook.com/username'><img border='0' src='https://blogger.googleusercontent.com/img/b/R29vZ2xl/AVvXsEjTzCjdq02oztU84HD1sd4NtVG_Zf9XjzxImRceG5YH7TRhvlbwQ_fda8AmDwt2jxSjArIcFjA6RKo0u6NRYbLITu57yB5ghRlRfTo8_pGsdtNbTvrDXqxp0ZbemOKsoheKuyUj2JRNL8Jc/s1600/e5.png'/></a></li>
 <li class='media_icon'><a href='http://twitter.com/username'><img border='0' src='https://blogger.googleusercontent.com/img/b/R29vZ2xl/AVvXsEilEtreeK7qsCMVLOR57kXetT-frXBpLSSTFA9mnpIGOQERgMQaY8CGpjrBL7E8dED-4ZI_9OJH1nyIym01xzKaI2rz-fOoWsQ0ZqBeP3MjftMGX3dwx7f9fbLdZRAg18cW3kW7FTaOWaJr/s1600/e6.png'/></a></li>
 <li class='media_icon'><a href='https://plus.google.com/XXXXXXXXXXXXXXXXXX/about'><img border='0' src='https://blogger.googleusercontent.com/img/b/R29vZ2xl/AVvXsEjQB7wovn8dygutEES_pWpaQ38CkgnePwgtlpGAVhK0SVDWsd4w-ZVYIKKsNBCQ0Bdx7rQBGftzemRv76AgqGmkt2bZox0lNqNMvuBwPPDr2oa4NYiQ3Vt9FsdoQfnaJcgXwpYxzZFv0aH5/s1600/e7.png'/></a></li>
 <li class='media_icon'><a href='http://name-of-your-blog.com/feeds/posts/default'><img border='0' src='https://blogger.googleusercontent.com/img/b/R29vZ2xl/AVvXsEiPEV62LeTJ67zE1hyphenhyphenHAZ8FcK09R6v-2WC7LvhUBOyBLoAwg2W1I_6RNJyxjPh054S8_KPqTF7N2cJ-ZRxuo4HSdHVfn2d8XuLE_NFZCeS8wsOo-ZO_5oQGvbgpwQFRQWmWSnqABP1n_A6A/s1600/e8.png'/></a></li>
 </ul></div>
Step 8. Customization
- Change what's in red with your username and id: the first is your Facebook username, the second is that of Twitter, in the third you should change the X by the ID of your Google+ profile and in the fourth you will put the name of your blog.
- To change the icons, just replace the urls in blue with the ones of your images.
- You can add more icons if you want, you just have to add before </ul></div> a line like this for each extra icon you want:
<li class='media_icon'><a href='Link URL'><img border='0' src='Image URL'/></a></li>
-Replace the "Link URL" with your profile ID and "Image URL" with the URL of the Image to be taken effect.
Step 9. Finally, Save the Template to apply the changes.


No comments:
Post a Comment